you are here [x]: Scarlet Star Studios > the Scarlet Letters > steel armature progress
<< before
gifting
after >>
I've got a contract!
July 17, 2006
steel armature progress
by sven at 11:59 pm
I've been doing tests and experiments in preparation for making my first steel armature. Here's a quick progress report...
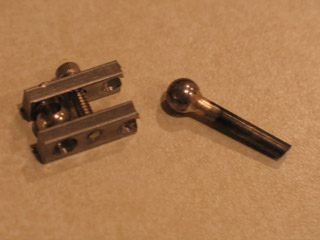
I think I've figured out the magic combination of factors needed to successfully drill balls on the lathe. Step 1: file a small flat surface on the bearing while it's in the lathe. Step 2: While the ball rotates at 1800 rpm, use a #2 centering drill fitted into my smaller drill chuck to start a hole. Step 3: Three turns of the handwheel will put a 1/8" dia. drill just about halfway through a 1/4" ball. (Actually, the balls that I'm going to use will be 5/16" dia. -- they're very nearly identical in size to the 8mm beads I used on my last armature.)
Above you see a ball that I've soldered onto a rod using 1/32" dia. Safety-Silv 56. I used three tiny snippings of solder; I think 3 or 2 would have been adequate. The silver solder was a pleasure to work with -- I didn't have any problems getting the parts to join.
On this test, I used 1/8" music wire for the rod. One of our Scarlet Letters readers warned me that this stuff would be hell on a hacksaw. I forget now who said this -- but thank you! Sure enough, I took the teeth right off my hacksaw's blade. If you hadn't given me the heads-up, I would have been baffled. ...I've bought some type 304 stainless steel rod as a replacement now.
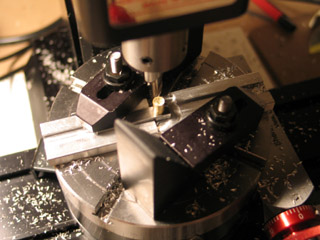
Today's project was to "radius" (round off) a sandwich plate. The big problem was how to clamp the plate down for cutting -- while not cutting the rotary table.
Upon consultation, stopmoe/machinist Mark Fullerton suggested that what I require is a jig. He even went so far as to create a 15-photo tutorial for me! Holy cow, that's above and beyond, Mark! BIG THANKS!!
The jig design that I came up with has little in common with what Mark showed me -- but the tutorial was very helpful nonetheless, and I'm going to be chewing on it for quite some time.
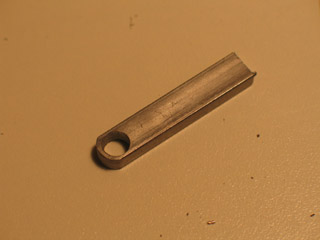
For my own jig, I milled a 1/4" wide x 1/16" deep slot in a 3/4" wide bar of 6061 aluminum. A 1/4" wide 1018 steel sandwich plate sits snugly in that slot. The plate is kept registered with a piece of 3/16" dia. x 1/2" long brass rod.
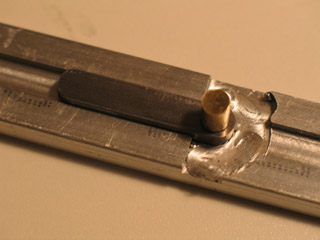
One of the trickiest parts of this operation is getting the rotary table perfectly centered underneath the mill's headstock. What I did was attach a lathe chuck to the rotary table, and a drill chuck to the headstock. I put a piece of 3/16" brass rod loosely in the drill chuck, and then maneuvered the X-Y table until the rod fell down into the lathe chuck. From that point on in the process, I made sure to never move the X-Y table.
I put the rod back in the drill chuck and used it to center the jig. I used a precision machinist's square to square the jig with the milling column. The slots in the rotary table had to be at 45 degree angles to the jig so there'd be room for hold-downs. I used two step-block hold-downs to keep the aluminum jig and steel plate in place while I was milling.
Making the jig and this first test plate took almost five hours. It's time well spent: at this point, I just need to get familiar with using my machines. I tried filing the opposite end of the sandwich plate by hand to make it into a curve. It was quick and easy... But nowhere near as pretty as the radiused end! ;-)
posted by sven | July 17, 2006 11:59 PM | categories: stopmo