you are here [x]: Scarlet Star Studios > the Scarlet Letters > mold design (part 2)
<< before
mold design (part 1)
after >>
the beginning
June 11, 2010
mold design (part 2)
by sven at 7:00 am
I want to do lipsynch using replacement faces. The idea is to have a set of ~12 masks that fit over a skull, which seats the puppet's eyes. Generic masks will be cast from resin, and then the mouths will be resculpted using either Super Sculpey or Magic Sculpt.
The resin will be cast from a 2-part silicone mold. The current iteration has several improvements over my last attempt:
- sculpt has better seal on mold bed
- to avoid entrapping bubbles, a "detail layer" of silicone is brushed onto the sculpt
- to conserve silicone, I've made a plaster "mother mold"
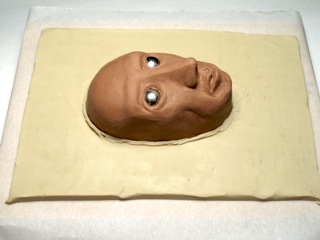
Fig.1: For my last mold-making attempt, the sculpt and mold keys were seated on a piece of wax paper. This go around, I decided to seat the sculpt on a bed of clay, to get a better seal.
I tried using Kleen Klay. However, I felt this material was much too soft.
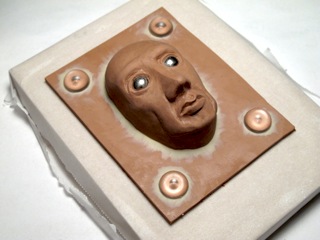
Fig.2: For my next try, I lay down a bed of Chavant NSP medium, which is much firmer. I could then use Kleen Klay as a sealant without marring either the sculpt or the bed.
An incidental note about nomenclature… Both Kleen Klay and Chavant are types of oil-based modeling clay. I've been wondering for a while what the general term is for this stuff: "plasticene" or "plastilina"? Turns out the answer is neither. Both those words are genericized brand names — like how "Kleenex" is often used to refer to facial tissue in general. (reference)
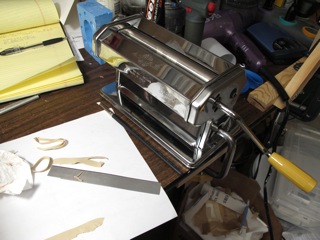
Fig.3: How did I get the Chavant to be so nice and flat? I sent it through a pasta roller.
Polymer clay hardly sticks at all; Chavant leaves a bit of a film on the roller, which causes it to begin sticking to itself. I fixed a few minor defects in the surface by using a brayer.
(I also tried using a butane micro-torch to melt the surface of the clay… But then I had to wait a long while for it to cool again. More trouble than it's worth — wouldn't do that again.)
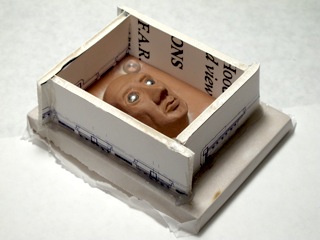
Fig.4: As with my last mold, the walls are made of 1.5" wide strips of repurposed foam core. I didn't cut the walls as long as before, though. Sealing the walls with hot glue was easier if the walls didn't hang out over the edges of the wooden base.
A note on cutting foamcore: box cutters work better than X-acto blades. Because the box cutter has a wider blade, it's more inclined to travel in a straight line.
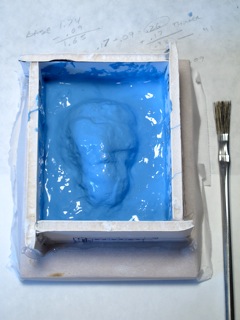
Fig.5: I mixed up a small batch of silicone base, catalyst, and thinner. I applied the silicone mix to the sculpt using a disposable "acid brush." After watching a few videos online, I picked up that the trick to doing a "detail layer" like this is that you dab with the ends of the bristles, rather than painting with strokes.
I baked the silicone at 170 F for about 90 minutes to cure the silicone extra fast — then I put it in the freezer to re-congeal the clay. The oven temperature was low enough that neither the hot glue nor the foamcore seem to have melted. Happily, the silicone also seems to cure faster than the clay can liquify.
Even so, I kept the kitchen door wide open and stayed out of the room during this part of the process. I want to minimize the number of things that can possibly release fumes when warmed. I was surprised to discover that MDF gets smelly when heated. For the second half of the mold, I made a cardboard tray, which was better.
I believe I have a better alternative to using foam core for mold walls, too… The next time I make a mold, the walls will be made out of Legos!

Fig.6: The cured silicone "detail layer" is fairly floppy. To give it some support, I created a "mother mold" by pouring UltraCal 30 plaster into the box.
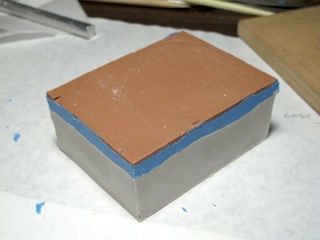
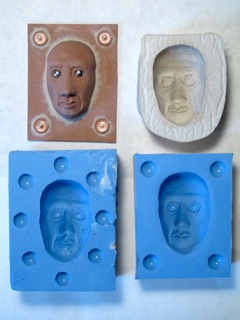
Fig.7: Here's the mold-in-progress after I've removed the foamcore walls. I really dig the layers of different colors!

Fig.8: The silicone pulls away from the plaster effortlessly. The mother mold bears the lumpy impression of the silicone. The lumpiness is enough to register the two parts together.
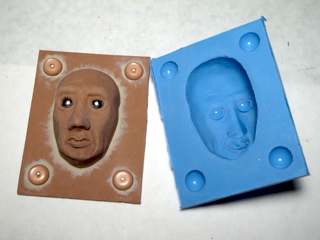
Fig.9: The sculpt came away from the silicone cleanly, and the detail layer has no bubbles. Awesome!
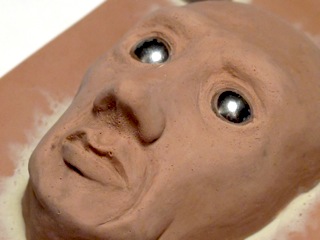
Fig.10: It's not a major flaw, but I was dismayed to discover that the acid brush left stippling in the sculpt. Apparently it's important to use a brush with really soft bristles. (Freezing the sculpt could also help protect it against brush marks.)
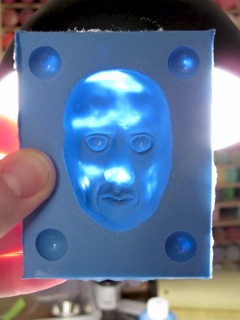
Fig.11: When I held the silicone up to a light, I discovered that there were several thin spots. The mold is useable — but I would have been smart to go in and apply a second layer of silicone on high areas of the sculpt to ensure adequate thickness.
[Now that I've done some castings in this mold, I'm noticing that the mold buckles a little at the thin spots… Acceptable but avoidable imperfections.]
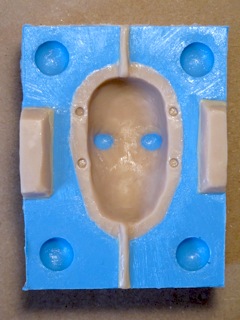
Fig.12: This is 2-part mold. Side A is done — now to make side B.
I sculpted what will be the interior side of the puppet mask using Super Sculpey. I chose it largely for where it falls on the soft/firm continuum… But I'm not so sure it was the best choice. When I put it in the oven, it didn't get fully hard — but it did cure enough so that I won't be able to re-use the material.
The vertical rods at the top and bottom are to be sprues, where excess resin can escape. If this were a simple mask, just one sprue would be necessary… But I'm actually going to wind up doing the forehead and lower face as separate pieces. More about that later!
The trapezoidal blocks on either side will create open spaces that make it easier to pry the two mold halves apart. The four little dots will hold 1/8"x1/16" magnets, that allow me to attach the mask to the back of the puppet's head.
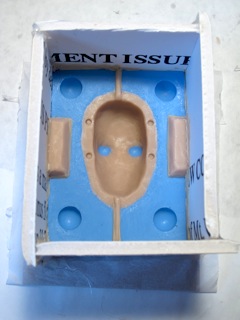
Fig.13: Once again I build a mold box. This time the walls are 3" tall. Cracks are sealed up with that ultra-soft Kleen Klay.
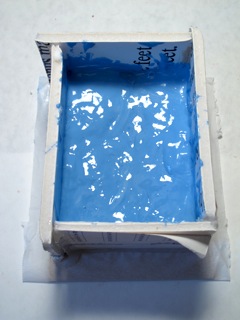
Fig.14: Again, brushing in a layer of silicone, using a dabbing motion to avoid creating bubbles. This time I used a soft-bristled art brush. Silicone destroys the brush — but I found ones being sold for 25¢ apiece at I've Been Framed (4950 SE Foster Rd), so not too big a loss.
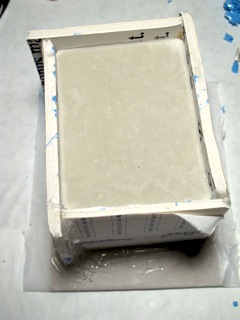
Fig.15: This second layer of silicone also needs a plaster mother mold.
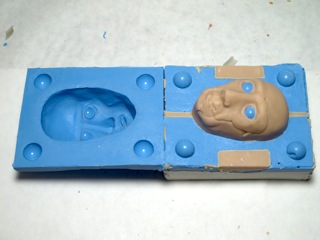
Fig.16: Opening the completed mold, I found that the Super Sculpey got partially cured in the oven. No big loss… But it wouldn't have been an issue if I were more patient and let the silicone cure at room temp for 6 hours.
Hypothetically, you could press Sculpey into the silicone mold and then bake it. Silicone tends to be quite heat resistant, so I'm pretty sure it could keep its integrity at the 275 F required for a full polymer clay cure… But I see no advantage at present. (Perhaps a less toxic solution than resin?)
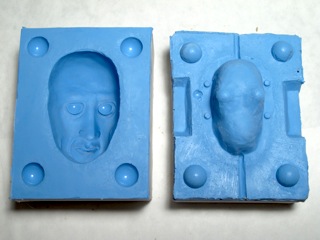
Fig.17: OK! Here's the completed mold all cleaned up. Time to pour some resin!
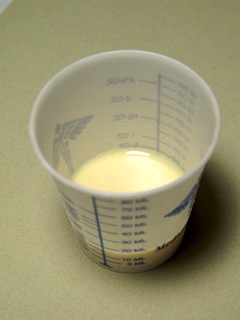
Fig.18: The resin I'm using has a 1:1 ratio of part A & part B, measured by volume. I got these paper measuring cups at the same store where I bought the resin — TAP Plastics. Using 15 ml of each component is about enough to make a full mask with minimal overflow.
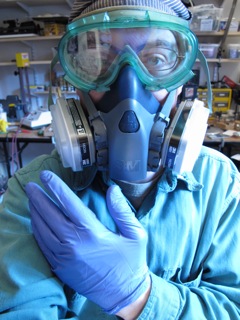
Fig.19: Safety first! When working with resin, you want impermeable gloves. I've got nitrile — I'm looking into butyl, which may have reusable options. Latex will not do — resin penetrates it.
Splash goggles. Long-sleeved shirt. And a respirator that has cartridges rated for organic vapors. I recommend 3M brand respirators. They're comfortable for day-long use — and these things only protect you if you actually wear them. If you go with 3M, the model no. 6001 cartridges are what you want.
* (Firefly reference. Shiny, eh?)
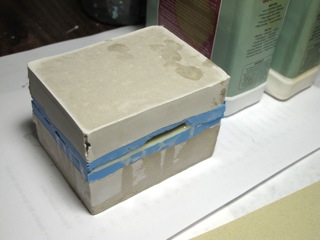
Fig.20: To get a good casting, there needs to be a little bit of overflow, which exits the mold through the sprues. For my first few castings, I laid down scrap paper on my desk to catch the overflow. Later on I refined my work area, covering a steel tray with sheets of wax paper.
Giving the resin 60 minutes to cure is ideal — but I found I could get away with demolding at 30 minutes. With about 15 minutes to clean up the mold and make another batch of resin, it looks like I can make one part approximately every 45 minutes.
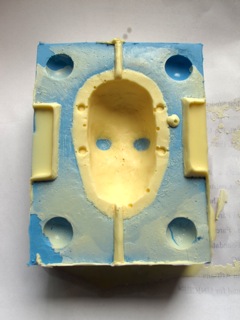
Fig.21: Having thin layers of silicone that fit inside plaster mother molds makes it very easy to remove the resin castings. They just pop out. The flashing can be snapped off, or cleaned off more carefully with an X-acto knife.
However, I do recommend waiting a while before carving the resin. When you first de-mold, the resin is still soft, and it will likely distort from the pressure of your grip.
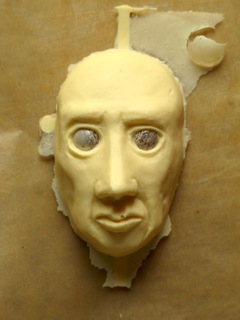
Fig.22: After doing a few pours, I've begun to recognize the areas that are most likely to capture air bubbles… The lips, the nose. So long as I pour carefully, it's not an issue. And if I'm nervous, I can just gently poke around in the area with a toothpick to break any hidden bubbles.
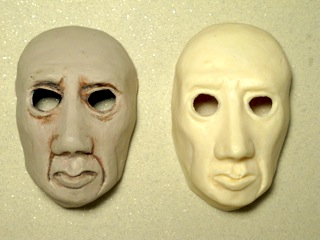
Fig.23: Comparing the Sculpey and Resin masks, you have to remember that the sculpt had to be modified before making the new mold… And the Sculpey's been painted, with makes it look better at this point.
The process of making a 2-part silicone mold is a great deal more time consuming than a simple plaster press mold. However, I feel much more confident that the masks I make will be identical in shape, and the mold is surviving the wear and tear of castings much better. So, in terms of my goals, I'd say the project was a success.
Next: Making a batch of generic masks and modifying them with different mouth shapes. Sorry folks, this may take a while…