you are here [x]: Scarlet Star Studios > the Scarlet Letters > Q&D - 1st pup done
<< before
holiday sale nov04
after >>
monster month - 22
October 30, 2006
Q&D - 1st pup done
by sven at 11:59 am
(Q&D = "quick and dirty")
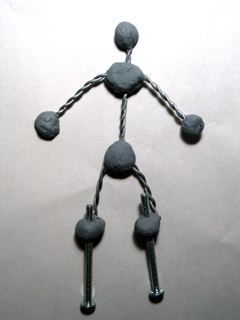
Yesterday I finished making making the first of two pups for my current "quick and dirty" animation project.
Around the armature, I wrapped strips from a sheet of cushion foam that I found for cheap at SCRAP! -- "The School and Community Reuse Action Project." I think the foam was 3/8" thick. My strips were about 1" wide, and I held them together with athletic tape.
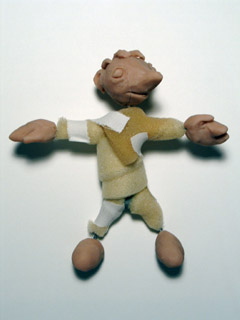
Around the cushion foam, I wrapped McDavid brand underwrap, which I found at G.I. Joe's (a local sports / automotive store). "Professional quality, pre-taping polyurethane foam underwrap. Used to protect the skin prior to taping."
This stuff does a great job of smoothing out the cushion foam... It would have worked even better if I'd taken a little time to first trim the foam more into shape, using cuticle scizzors.
I used cheap acrylic paints to do up the Sculpey bits. For the flesh tone, I used "bambi brown" (a tan), and then painted over it with a thin layer of white. (In general, I've found that tan + white does a remarkably good job of simulating "caucasian" flesh tones.)
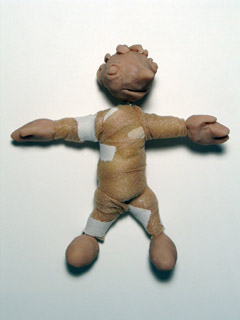
I wanted to try a trick I heard about: spraying on a layer of clear gloss varnish, then a second coat of matte varnish. I thought it might give me a stronger surface...
I'm not entirely happy with the results. The finish is still a little glossier than I'd like, after applying that second coat. And worse, a faint orange color has appeared in places. Why? Possible explanations:
(a) I used Kryolan gloss, and Citadel matte -- maybe they interact badly?
(b) Maybe Citadel varnish is faintly orange naturally, and it became visible because I put on too thick a coat?
(c) Maybe the varnishes began to dissolve the cheap acrylics, leaching out some of the pigments?

I clothed the pup without making patterns first. I just cut out pieces of fabric, glued them on, and then cut off excess. As with Percy's costume, I used Fabri-tac glue to good effect.
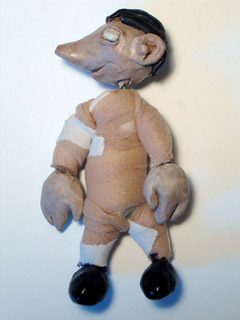
Overall, I'm pretty happy with this puppet. It's pretty seriously lopsided -- but hey, that's part of working "quick and dirty." As a final touch, I added little dots of black Sculpey to the eyes. That'll probably work fine, but today I picked up a small pack of black Van Aken plastilina, which I think will work even better.
The one problem with this pup that I want to be sure to remedy in all future pups is how I've dealt with tie-downs and rigging.
The tie-downs are 10-24, which I'm now realizing will create huge holes in the set floor. I want to move to using 4-40 threaded rod and knurled thumb screws for tie-downs, and make that my standard practice. (Marc Spess shows this approach in the excellent Secrets of Clay Animation Revealed! eBook -- and I've seen it used elsewhere, too.)
As for rigging: I forgot to build any rigging points into the armature, and am not sure as of yet how I might rectify the oversight. The character is supposed to spend some time crawling around on a big comfy chair... Which is essentially the same as having him walk on any non-tie-downable surface: you have to use a walking/flying rig to hold the rest of him in place, as just one part of him moves.
The "dad" pup is almost done -- just needs to get clothed now. More about him soon.
posted by sven | October 30, 2006 11:59 AM | categories: stopmo