you are here [x]: Scarlet Star Studios > the Scarlet Letters > my stopmo camera set-up
<< before
monster month book release party - part 2
after >>
lsgl trailer on strange aeons dvd!
February 8, 2008
my stopmo camera set-up
by sven at 7:00 am
"A Word From Professor Ichbonnsen" was a big leap forward for me in several ways. I did lipsync for the first time... I explored a pose-to-pose approach to stopmo... And I shot using a digital still camera.
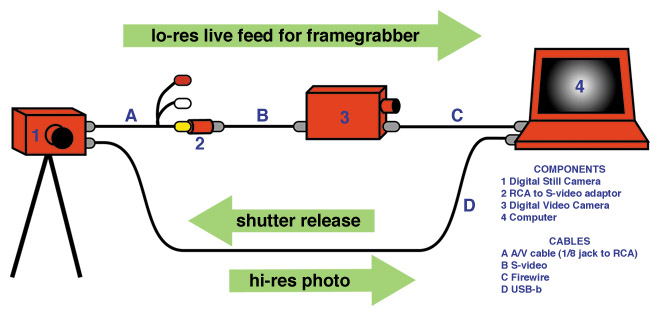
I recently wrote a post titled "how to connect your digital still camera to a computer - explained"... So I'm not going to go into every detail about my set-up today. However, what that post was really missing was a good diagram. ...So here ya go, I've created one.
Note: In this configuration, the DV cam is being used as an analog-to-digital converter.
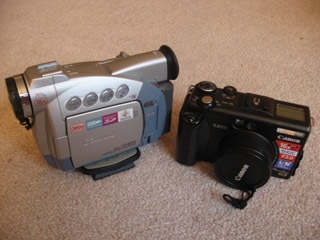
On my first stopmo film, The Great Escape, I used the DV cam for image capture. The picture quality was nowhere near as good as what I can get with the still cam -- but one nice thing was that I only needed one cord (the FireWire) going between it and the computer.
Oh, and I guess another nice thing was that I only needed one piece of software running: FrameThief. Using a DSC, I need 3 softwares running simultaneously: FrameThief, RemoteCapture, and Proxi.
Proxi -- since you probably haven't heard of it -- manages applescripts, so I can trigger FrameThief and RemoteCapture with a single keystroke. I am much indebted to Evan DeRushie for sharing the relevant script with me, and pointing me in Proxi's direction.
There is a perennial problem with using a DSC to shoot stopmo: flicker. Stopmoes complain about flicker furiously... But you don't often see an actual example. I thought it would be illustrative to show an abandoned shot here.
Watch the clip. See how some frames are randomly lighter than others? That's flicker. I made the still shot above out of a flicker frame and a non-flicker frame to highlight the contrast.
There are several possible causes of flicker:
- A camera's internal programming automatically adjusts the images it takes, before you ever see them. This can lead to inconsistencies. The way around this problem is to shoot in RAW format. When you look at a RAW file, you're seeing what the capture chip actually saw. The files are huge, but you also (I'm told) have a lot more ability to adjust the images.
- With most DSCs, the camera's aperture re-adjusts itself with each shot taken. For consumer-grade cameras, there's just nothing to do about this. For the high-end DSLR cams, though, you can get lenses that don't auto-adjust. It's a very pricey solution.
- Fluctuations in electrical current can effect both the camera and your lighting set-up. In a residential home, a refrigerator turning on or off can have a significant impact on your images. The solution: to get a voltometer which can smooth out the spikes and dips in your current.
Thanks to some early-morning advice from my photo-wiz friend Michael Hall, I was able to figure out how to use RAW files. And happily, that solved most of my flicker problems.
(By the way: most image editing software can't deal with RAW files. Luckily, by digging around in my applications folder I was was able to find a program -- which came with the camera originally -- that can translate RAW files into jpgs.)

So, most of my flicker woes were solved... But not all of them. If you watch the final film carefully, there's a hint of flicker in that first shot of Ichbonnsen.
It's a curious flicker, though... It seems to move from the top of the screen to the bottom... It doesn't seem even. Could it be the result of a reflection, or some other practical lighting condition?
Right now, I think looking into voltometers is my next least-radical step.
posted by sven | February 8, 2008 7:00 AM | categories: stopmo