you are here [x]: Scarlet Star Studios > the Scarlet Letters > sculpting: new test snippets
<< before
now showing: "Experiments in Super8" and "Two Men, One Pair of Glasses"
after >>
stopmo puppet work: eye, feet, neck
January 30, 2006
sculpting: new test snippets
by sven at 12:30 am
I've done a bunch of little test snippets with different sculpting materials this past week. Lots of things to show you!
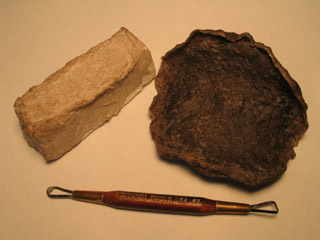
The papier mache mash I wrote about on Jan. 23 has finally dried. I think it took about five (maybe six) days. The stuff that I baked turned dark and tough; it reminds me of a chew toy you'd give to a pet dog... I'll never try that again. The unbaked stuff turned a pale gray; it has potential. I'm thinking about how I could use it for stopmo animation sets.
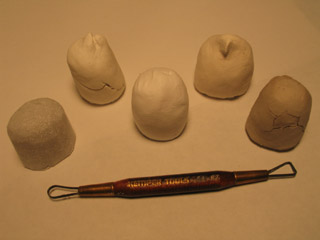
Here are several test "fingers" I made using different materials. From left to right:
- insulation foam
This is a bit of carved insulation foam without anything on it. The rest of the tests involve spreading different substances on top of one of these. - "Sculpt It!"
This feels like a high-grade Play-Doh; sort of soapy, very slightly springy. When I try to put it through the pasta machine, it becomes flakey. Loop tools work poorly. It smooths easily with fingers. It starts feeling dry to the touch after 10-15 minutes, but remains workable longer. It shrinks while drying; since it was applied over a foam core, this made it crack. - Foam Putty
I found this at a model train store. It has a very fine powdery grain, like spackle. It has the consistency of very light frosting. It can be spread, but is impossible to sculpt; it's only good for filling in cracks in pieces of foam, I think. It didn't crack while drying. - Creative Paperclay
The fiber content is very fine. Smoothing with fingers works OK; water helps. Loop tools work pretty well, but leave a rough grain that needs smoothing; sometimes using the loop tool leads to crumbling. Doesn't go through the pasta maker well. Doesn't adhere to the foam core easily. Cracked while drying. - air-drying clay mixed with wood flour
Wood flour is sawdust that's been ground into a fine powder. Here I was trying to reproduce the Noah's Doll technique. It was difficult to mix the clay and wood flour -- very crumbly. When I added water, it became very messy. I think perhaps I'm missing an ingredient: maybe wheat paste. Once I got this stuff mixed, it was indistinguishable from regular clay. Cracked while drying
I wasn't very happy with any of the preceding materials. Then I had an epiphany... Try sculpting in three layers: a core of foam, covered with a hard shell of epoxy putty, and a "beauty layer" of Super Sculpey on the outermost surface. I tried it -- and was thrilled! This is technique I've been searching for, like, forever. Now it's just a matter of refining it.
I particularly need this technique for making stopmo puppets... Last weekend I was brainstorming, doing sketches of characters that I could turn into new puppets. In the process, I discovered that most of my characters have over-sized heads. This is a big problem for two reasons. One: the weight of these heads -- if they're solid -- is going to bend my puppets in half; they won't be able to stand up. And two: Super Sculpey doesn't bake well if it's more than about half an inch thick -- solid heads would either crack, or not cure at all. Solution: make hollow heads!
[Added benefit: Super Sculpey for the top layer can be put through the pasta machine. When you lay Sculpey sheets over the epoxy putty shell, you know exactly how thick they are. That means that it should be really easy to guess how long the head needs to bake. ...With the Moon Baby puppet, I had a terrible time trying to figure out what my baking time should be.]
If I make a hard shell of epoxy over a soft base form, it should be easy to hollow it out to make a hollow puppet head. How should I do this? I've come up with a five possible options so far, and am still exploring...
- Work on a base of foam, dissolve it out using acetone.
- Work on a base of foam, melt it out with a heat gun.
- Work on a base of foam, use a rasp to rake it out of the shell.
- Work on a base of plastilene, use loop tools to dig it out.
- Work on a base of plastilene covered with cling-wrap, dig and pull it out.
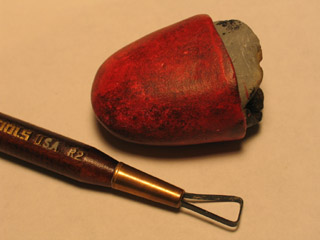
On the snippet above, I tried the acetone trick -- using nail polish remover, actually -- but it didn't work for me.
Then I tried a heat gun; that worked very well -- but it releases toxic fumes, so this isn't a very good option.
I have only just purchased a suitable rasp -- I still need to try using it. (It's what's recommended in the Noah's Doll tutorial.)
Plastilene: that's probably the way to go. It's what I try out in this next experiment...
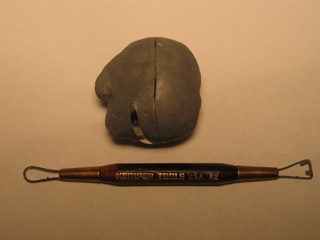
I didn't really get the photos I'd like to have for explaining this next thing... What you see above is a piece of Roma Plastilene that I've already covered with plumber's epoxy putty. I only wanted a very crude form; detail work would go on top of this, using Super Sculpey. I roughed out a nose and a chin...
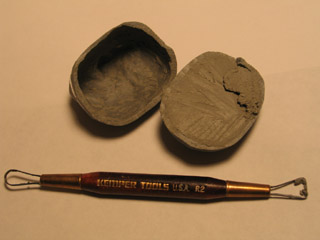
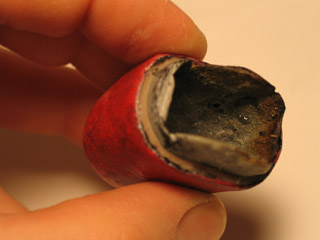
I cut the epoxy putty shell in half with a hobby saw. In this picture I've already scooped the plastilene out of half of the shell -- but you can see that the other half is still filled.
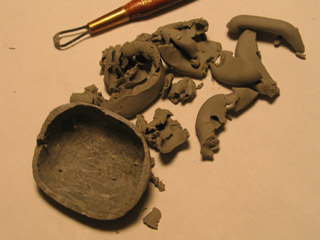
This picture maybe gives you a better sense of what it's like to dig out the plastilene. It comes out fairly easily -- but leaves a waxy residue. On my next try, I'm planning on covering the plastilene form with cling-wrap; that ought to make it easier to get out cleanly.
When I dug out the plastilene from the first half, I was dismayed to discover that the shell wasn't entirely solid yet. It was definitely firm -- but bendable. I was worried that the plastilene had reacted with the epoxy chemically, preventing it from curing. Since I'd been working outside on the porch, to give myself good ventilation, I also wondered if cold weather was impeding the cure...
To my great relief, the epoxy was rock hard the next day. Lesson learned: 20-minute epoxy is workable for five minutes, and hard to the touch in twenty -- but it may be a few hours before it's fully cured.
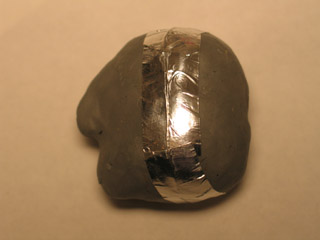
Here I've taped the two halves of the head back together using metal tape. I found it at G.I. Joe's -- a NorthWest automotive and sporting goods store -- in the auto section. I've been told you can also find metal tape in with the plumbing supplies at a hardware store or at Home Depot. My thinking here: since the Super Sculpey layer is going to be baked, I want an adhesive that's going to hold up under heat. Metal tape seemed right for the job.
I haven't gotten around to putting Super Sculpey on this snippet yet -- but I'm very pleased at how firm and lightweight it turned out to be. Yay!!
Oh... I should mention that the previous snippet -- the red tongue-like one -- was painted with acrylics. I tried "tonal underpainting" for the first time. It's a technique that was used by the old masters, where they would do their painting in black and white, and then "colorize" it with glazes. For the "tongue", I sponged on a black undercoat, sponged on a speckling of white, and then used a large soft brush to apply thin coats of red. I'm simply in love with the results. It's got such depth of color... I'm eagerly looking forward to exploring this painting technique further.
posted by sven | January 30, 2006 12:30 AM | categories: sculpture, stopmo